Would you like to browse our deck tile products and accessories?

- By: Designer Deck
- Tags: Staining Wood Deck Tiles
- Category: Blog
- 0 comment
A sun-kissed afternoon, with birds chirping and the gentle sway of trees in the breeze. Now, imagine stepping onto your deck, where every footfall feels like a step closer to paradise. That’s the magic of staining wood deck tiles – transforming your outdoor space into a haven of relaxation and style.
Understanding Wood Deck Tiles
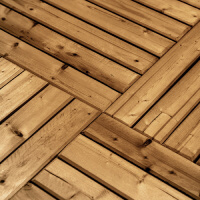
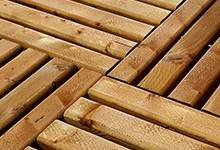
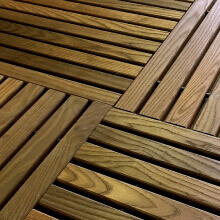
- Wood deck tiles aren’t just your average outdoor flooring – they’re the secret ingredient to crafting a picturesque outdoor retreat. These versatile marvels are available in various wood varieties, each boasting distinctive allure and personality.
- Whether it’s the timeless elegance of cedar, the exotic allure of teak, or the rustic warmth of pine, there’s a wood deck tile to suit every taste and style preference.
- But what makes wood deck tiles truly special is their versatility. From balconies to patios and rooftops to poolside lounges, these tiles can turn any dull surface into a stunning outdoor oasis.
Preparation Before Staining:
- Before you break out the stain, it’s essential to prep your deck tiles for their makeover. Think of it as laying the foundation for a work of art.
- Start by giving your deck tiles a thorough cleaning. Sweep away debris, scrub off dirt and grime, and let them dry completely.
- Next up, sanding. Smooth out any rough spots or imperfections to ensure a flawless finish.
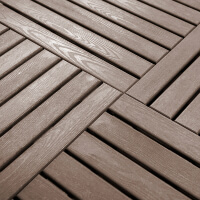
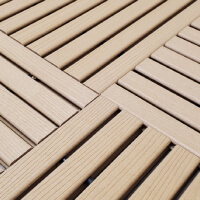
- And finally, the fun part – choosing the perfect stain. Consider the color of your surroundings, the ambiance you want to create, and of course, the durability of the stain against the elements.
Steps to Stain Wood Deck Tiles

-
Prepare the Surface:
Before diving into staining, ensure your wood deck tiles are clean and dry. Clear any dirt, leaves, or other mess from the deck tiles. If there are tough stains or dirt, use a gentle soap and water to clean them off. Let the tiles dry completely before moving on to the next part.
-
Sand the Surface:
Sanding is important to make your deck tiles smooth and even. Use fine-grit sandpaper to rub the surface, especially where it feels rough or bumpy. Sanding not only makes the surface smoother but also helps the wood soak up the stain better.
-
Choose the Right Stain:
Selecting the appropriate stain is key to achieving the desired look and protecting your wood deck tiles from the elements. Take into account the type of wood you’re working with, the color you want, and how much protection is required. Oil-based stains go deep and last long, while water-based ones are easier to clean and dry quicker.
-
Test the Stain:
Before you stain the whole deck, try it on a hidden part first. This helps you see how the stain looks on the wood and if you like it.
-
Apply the Stain:
After picking the stain, it’s time to put it on the deck tiles. Use a brush, roller, or sprayer to spread the stain evenly over the surface. Work on small parts at a time to make sure it covers well. Apply the stain following the direction of the wood grain for a natural appearance.
-
Work in Sections:
To avoid streaks or uneven coloring, work in manageable sections, starting from one corner of the deck and working your way across. Ensure each section overlaps slightly with the previous one to create a seamless finish.
-
Wipe off Excess Stain:
After you put on the stain, use a fresh cloth to remove any extra stain from the deck tiles. This helps to prevent puddling and ensures a more even application.
-
Allow the Stain to Dry:
After you put on the stain, make sure it dries fully before stepping on it or putting any furniture on the deck tiles. The time it takes to dry can change depending on things like how warm or humid it is, and what kind of stain you used. Just follow the instructions that came with the stain for how long it needs to dry.
-
Apply Additional Coats (If Necessary):
To get the color you want and protect the wood well, you might need to put on more than one layer of stain. Let each layer dry completely before putting on the next one. Keep doing this until you get the color you like.
-
Seal the Surface (Optional):
For added protection and longevity, consider sealing the stained deck tiles with a clear sealer or topcoat. This helps to lock in the stain and shield the wood from moisture, UV rays, and general wear and tear.
-
Enjoy Your Newly Stained Deck Tiles:
Once the stain has dried and any sealant has been applied, step back and admire your handiwork. Your wooden deck tiles are now stained, protected, and all set to be enjoyed for many years. Sit back, relax, and soak in the beauty of your revitalized outdoor space.
Enhancing the Look of Stained Deck Tiles:
- Now that your deck tiles are stained to perfection, it’s time to take your outdoor oasis to the next level.
- Add a touch of personality with decorative elements like outdoor rugs, lanterns, and throw pillows.
- Create cozy conversation nooks with stylish furniture arrangements that invite guests to linger long into the night.
- And don’t forget to green up your space with lush plants and vibrant flowers – after all, what’s a paradise without a little bit of nature’s beauty?
Conclusion
As you gaze upon your newly stained deck tiles, basking in the glow of your outdoor sanctuary, remember this: you’ve just unlocked the secret to elevating your outdoor oasis from ordinary to extraordinary.
You can turn your deck tiles into an outdoor masterpiece with some creativity and effort. Let your imagination go wild! There are endless possibilities. Call Designer Deck for the best service ever.


